TL;DR / Links
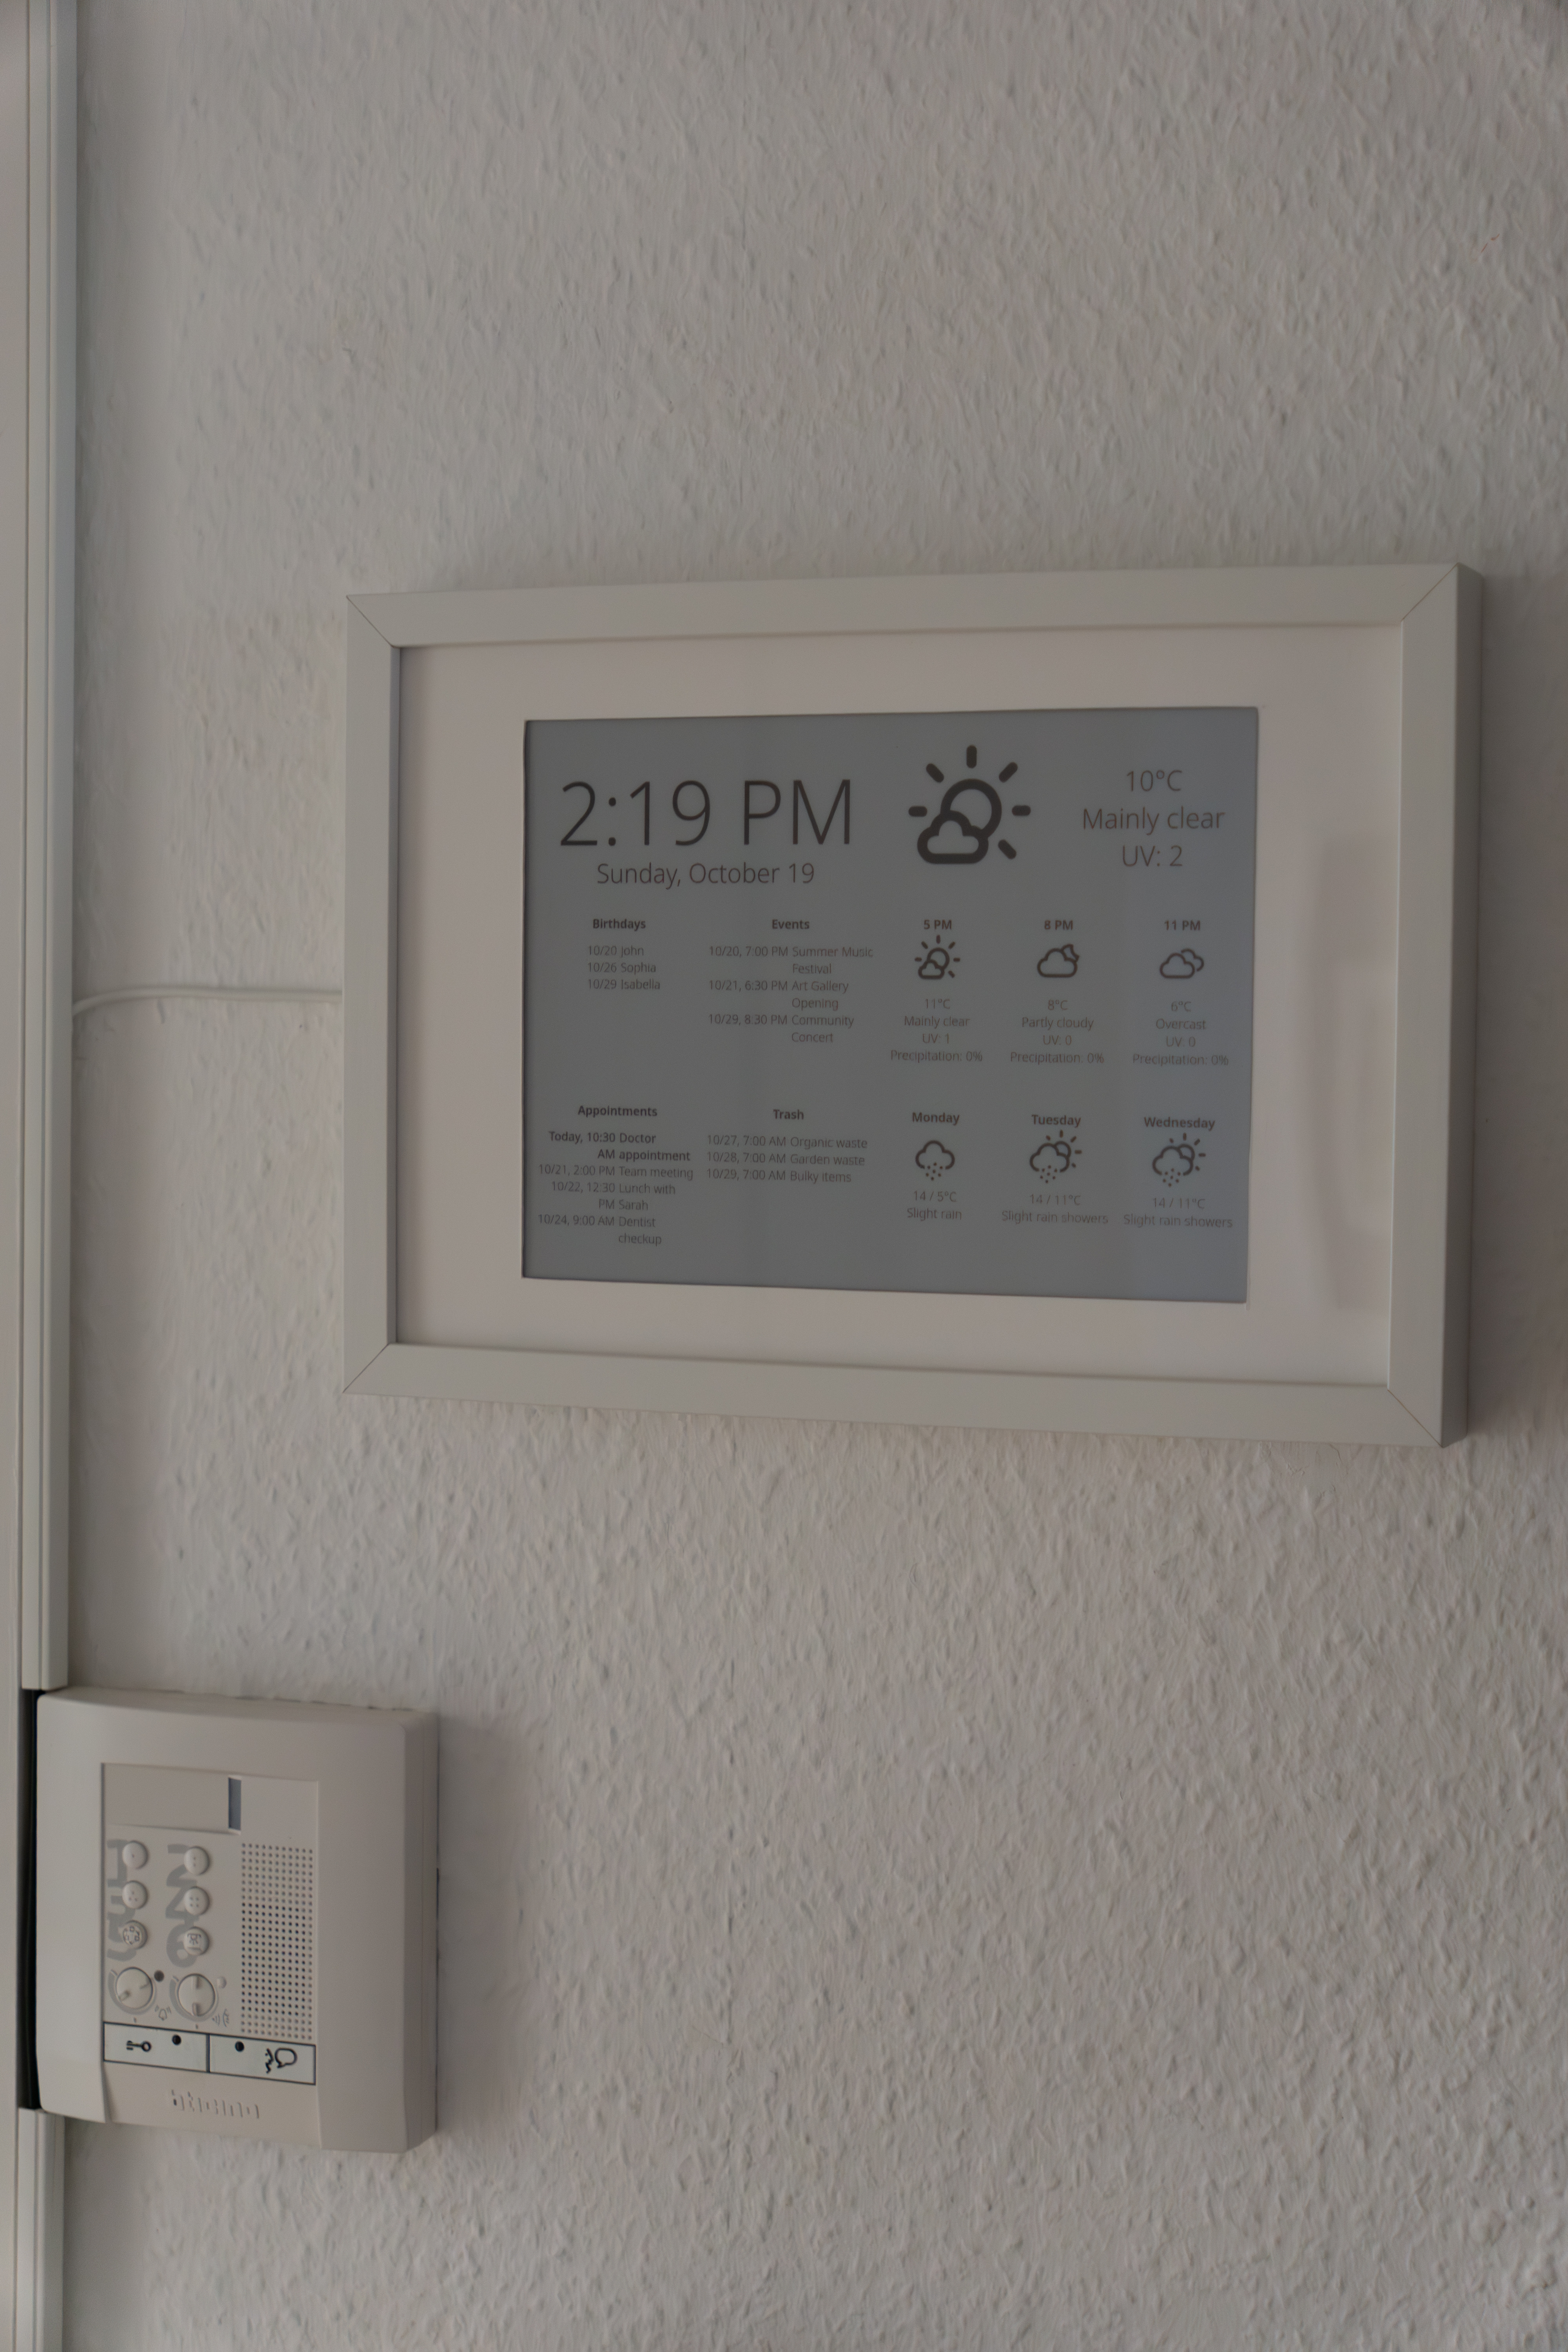
I created another infodisplay which does not only display the weather and upcoming birthdays (now via CardDAV), but also appointments & trash dates from your calendar (using CalDAV) as well as events in your city.
Hardware
- Display: Waveshare 10.3"
- Frame: Ikea Hovsta (EOL, sadly)
- Backplate: 3D-printed (Download)
- Server: Either a local machine or vServer, your choice
- Client: Rasperry Pi Zero 2 W (if you don’t want to edit the backplate’s 3D-model)
Software
Pictures

Prologue
When I had trouble with my internet connection a few months ago, I needed to switch to my ISP’s “official” router, so that they could find out where the point of failure was. By doing so, I unknowingly cut off my old infodisplay from the internet, because the wifi was disabled (Vodafone lets you pay an additional monthly fee for using wifi on “their” router, which is one of the many reasons I don’t want to use it).
After everything was back to normal again, I needed to restart the KUAL application which shows the website, but got an error saying that the developer’s certificate had expired. Naturally, I dug into that problem for a few hours days and when I was not able to find a solution which worked on the combination of a newer firmware with the now 11 years old hardware, I wearily began looking for alternatives.
I quickly decided to not abuse an eBook-Reader again, because I wanted to build a more stable and maintainable infodisplay this time. During my “research” (googling), I came across many posts/projects with the same idea/mentality, but the one which inspired and fitted me the most was Kimmo Brunfeldt’s. It looked exactly how I imagined it, but it still didn’t fully match all my requirements: I wanted to also display other things than the weather (e.g. a clock) and thus update the display more often, so using a battery wouldn’t work for me. Also, I wondered if there would be a better way to mount the Raspberry and driver board on the back and quickly saw the chance to design (and print) my first custom 3D-modell. ;)
Those damn pins
Because I had read Kimmo’s post, I already knew the first (and most nerve-racking) thing to do after holding the e-ink/e-paper display in my hands: Getting the GPIO pins off the driver board. Because I neither have any experience in desoldering neither a nearby lab for that, I first tried with a metal saw, in order to produce a clean and even cut. But after seemingly hours of work, I had beaten only about 5 and a half (of 40) pins. Sweating and annoyed, I also went the coarse way and clipped them off one by one with side cutters.
3D-modelling
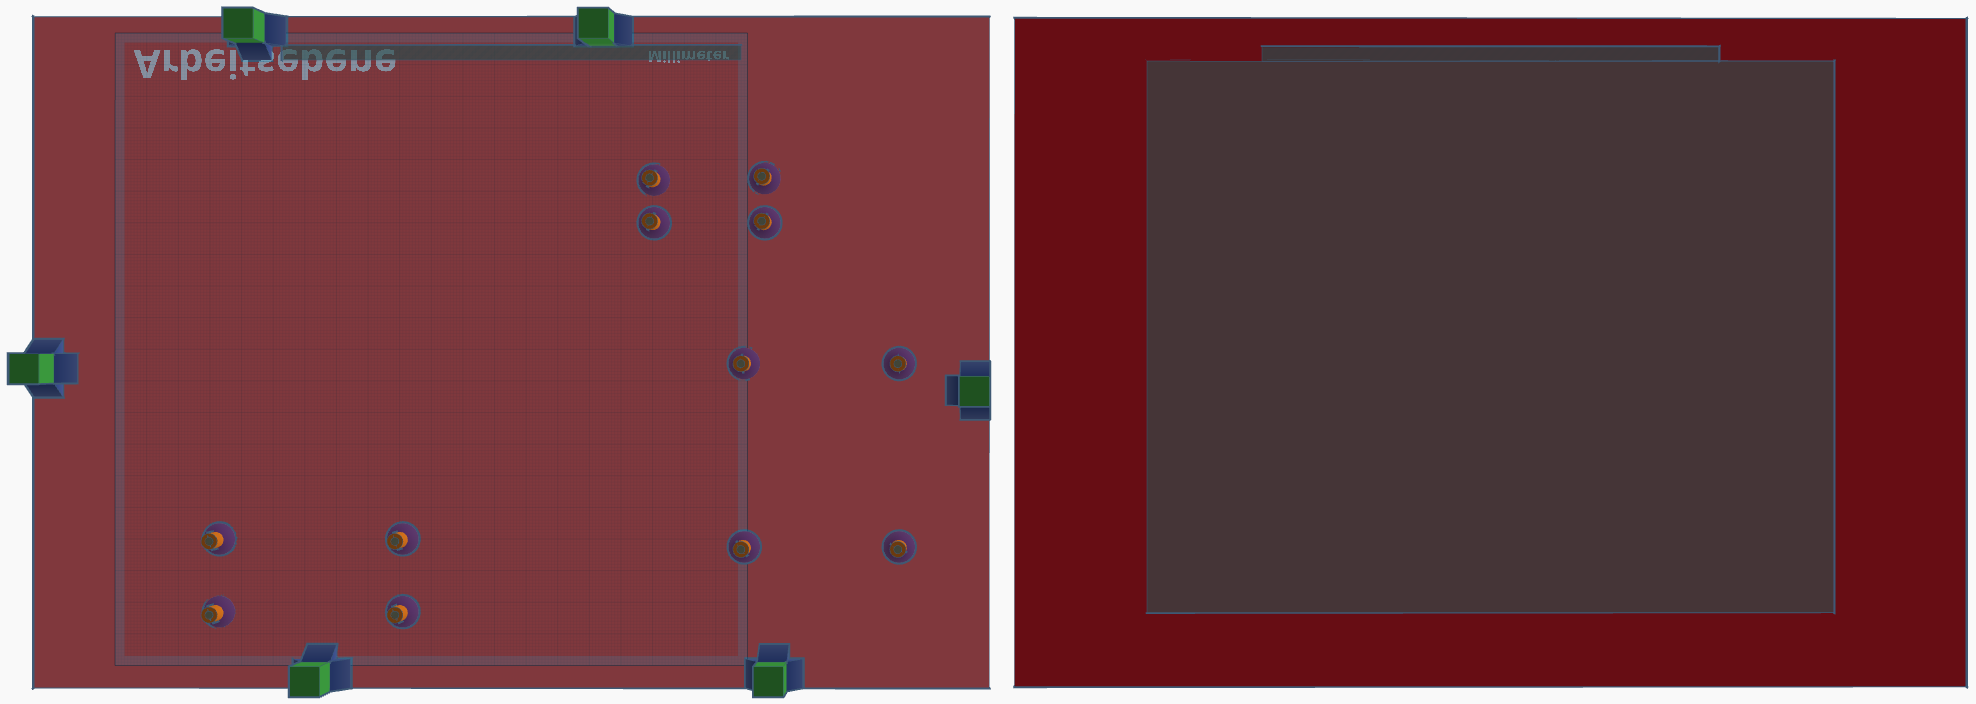
After verifying everything still worked, I began measuring the IKEA frame and desiging the 3D-model for the backplate. Luckily, many of the needed dimensions are documented already; the Raspberry Pi Zero 2 W has a product brief datasheet available and the sizes of the Waveshare display and it’s HAT are both shown on the product website (click on “wiki” below the pictures, then scroll down a lot until you reach “Outline Dimensions”).
At that point, I thought there was not much left to do in these terms apart from pouring the data into TinkerCAD, but I was quickly proven wrong. It turned out to be pretty uncommon for a 3D-printer to be able to print something over 250mm, but the longer side of the backplate needed to be 302mm. After evaluating professional options (way too expensive) and looking up classified ads (no luck with the desired size), I eventually found someone by chance on a german imageboard, posting his enormous Elegoo OrangeStorm Giga.

First try of the 3D model
He was not only able to print my model, but also kindly helped me change the model so that it would be printable in the first place. The problem I had was that there needed to be a slot for the display on the front, but also mounts for the Pi, driver HAT and display cable connector on the back. But printing both in one act was not possible, because the filament would sag down onto the build plate. Thus, front and back had to be splitted into separate parts and glued together after printing. Also, the mounts were too fragile, which could be solved easily by some additional strengthening at their bottom.
Improved and separated 3D model
When the model finally arrived, everything looked great at first. All the screw holes had the right spacings and the brackets of the frame fitted their plastic counterparts (those quadratic things sticking out of the backplate, not sure what to call them). Even the pretty firm USB cable I used to connect the Raspberry and driver board didn’t make any problems.
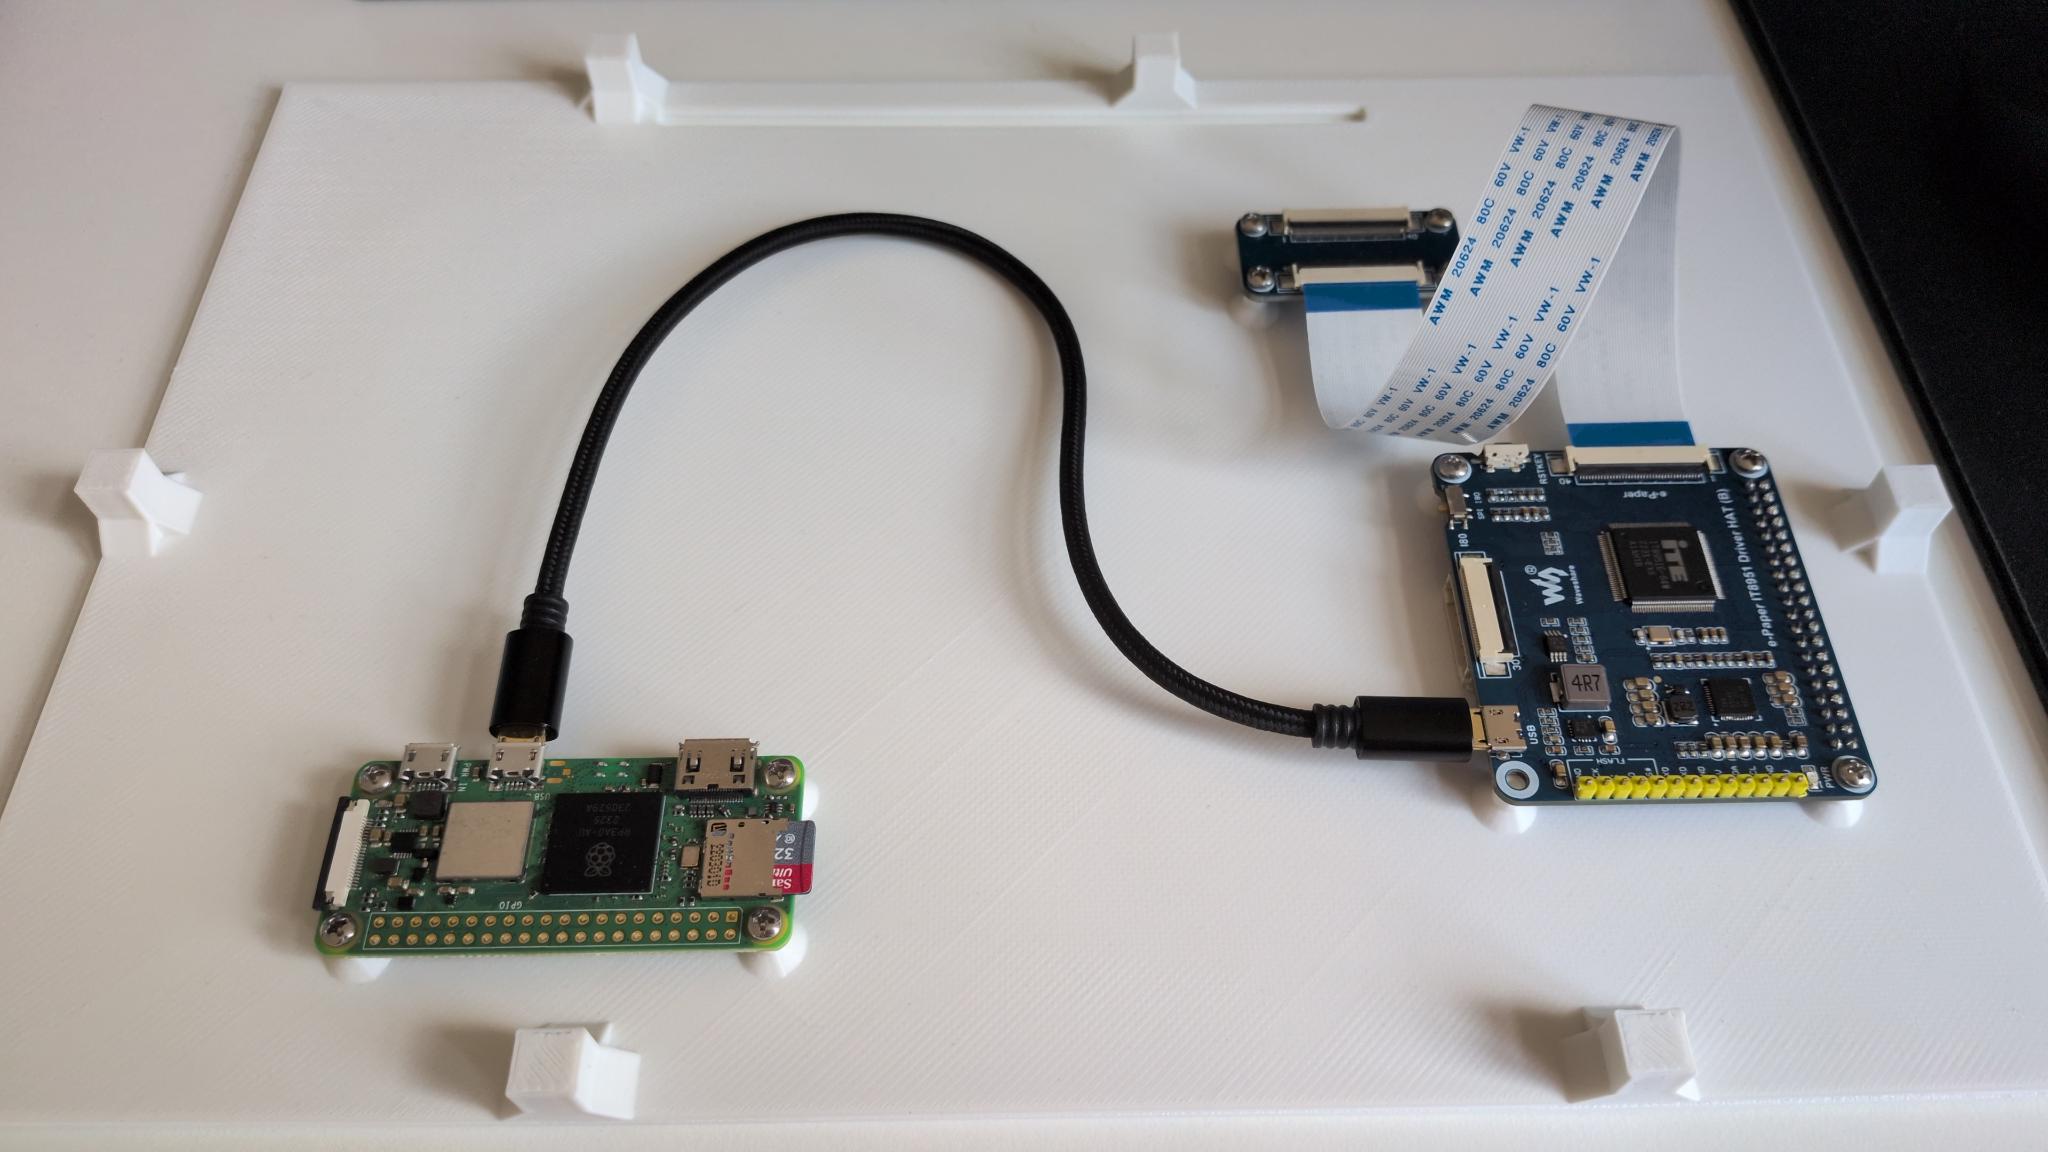
Printed backplate with hardware installed on it
But as I tried to connect the display, I had to realise that I misplaced the connector for the display cable in the model and because the cable is flat, it was not flexible enough to even out that mistake. Of course, I already fixed this in the version I linked above, but at that point it felt like all the checks I did were wasted and there would not be another solution than printing again (which would take at least another week or two (including shipping).
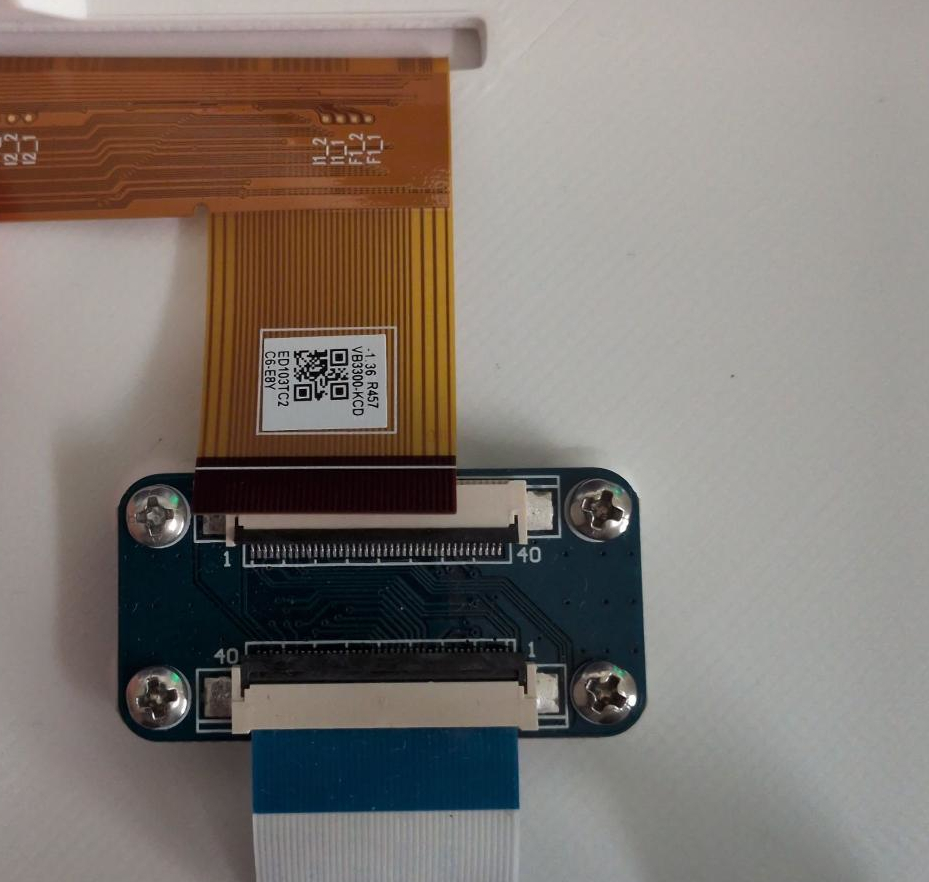
So close, but not connectable
After fiddling around for an hour with no good result, I told a friend about this problem and he just said: “… can’t you just move it by using only one pair of screws?” - a quick, easy and free solution I would never have thought of! I tried it immediately and even though there was some tension on the cablel, the connector was strong enough to hold it in place, so that I was finally able to display a test image again.
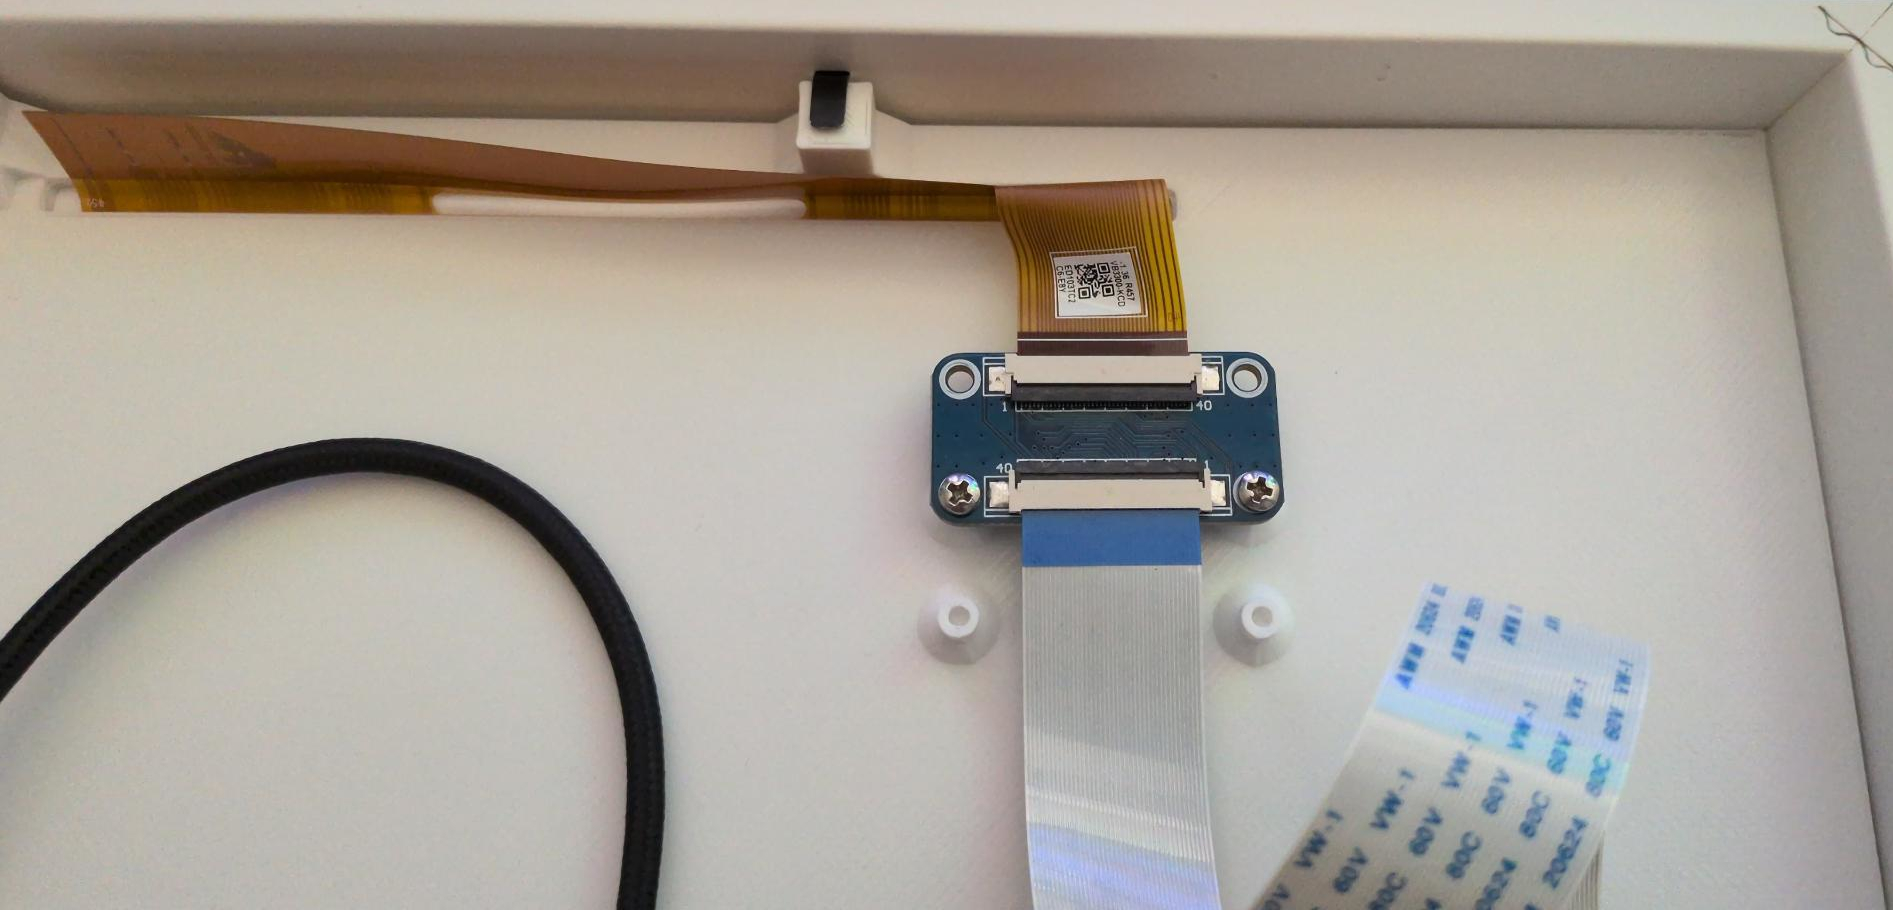
Improvised solution
Architecture & implementation
Once the hardware was working and looking as desired, I started thinking about how I wanted to implement the software part. I quickly decided to keep the client/server architecture from the old project, because this enabled me to develop especially the frontend(/displayed content) separately. I didn’t want to wait for the (relatively slow) eink-display every time I made as small change and also thought of maybe pre-rendering an image on the server at first, because I didn’t know if the Pi would have enough RAM for running a browser and taking a screenshot in the display’s resolution at the same time yet (it does, luckily).
At first, I defaulted to use Go for the server, as it has become my go-to language for backends. But the only package that implements a CalDAV (needed to fetch calendar entries) and CardDAV (for Birthdays) seemed to be go-webdav, which unfortunately (still, at the time of writing this) has an issue with Apple’s icCloud/iCal, preventing any of my girlfriend’s appointments or her contact’s birthdays to show up on the infodisplay.
I googled for about half a minute and discovered tsDAV, which even supports the Oauth2-Credentials for Google’s CalDAV/CardDAV API out of the box. Also, it was a very welcome finding, as I had wanted to use TypeScript in a smaller project for some time, because I never did before and wanted to see how that works for me.
This also was the case for Rust, and when I found Martijn Faassen’s USB driver after a quick Github search yielding it as the only feasible result, instantly decided to use both the driver and progamming language for my client.
Setting up the Raspberry Pi was very easy and convenient in the end; I just used the rpi-imager, with which you can already create a user + password, add a WiFi network, enable SSH and define a static IP (if desired) before even inserting the SD card for the first time. This was quite a pleasant surprise. Of course, as an Arch Linux user, I had to try Arch ARM (for which this kind of luxury is not supported, sadly) against Raspbian Lite, but the latter used even less RAM than, so that the choice was even more straighforward.
What I found the most interesting and appealing was that I now only needed to install the chromium-browser package after the initial boot and was good to go. Because of the cross-compilation, not even Rust is needed and additionally, one can probably (never looked back and tried) save a lot of time by avoiding the Pi’s slow CPU for this.
If you’re interested in implementation details, please follow the links to the Git repositories in the TL;DR / Links section.
Conclusion
I earned a lot of new knowledge during the time I spent on this project and thus already fulfilled my lifelong goal to always keep learning. It was very interesting and fun, but also took a lot longer than I expected at first.
Nonetheless I would still encourage everyone reading this to create their own information display. Only when the old one was gone (and the new one not ready yet), my GF and I noticed how many times we looked at the (now) blank spot on the wall near our apartment door, whether when just passing by in the hallway or before going outside. It took us only a few days to realize what we didn’t even waste a thought on before: The display had become a visual focus point in our daily lives where we could see all the information we wanted at a glance.